Tuesday, 31 December 2013

Thornycroft Building #4 - Museum

In the photo below the Museum is the building bottom right.


 The Thornycrofts Motor Works, Basingstoke, 1928 - Britain from Above

 Function

A museum and garage with a lean-to boiler house in the north west corner. The museum is probably the place where Steam Van No.1 was stored. This being the first Thornycroft commercial vehicle shown to the public in 1896, two years before Thornycroft moved from Chiswick to Basingstoke.

Time Line

This building was a later addition to the site. It appeared by 1914 but without the large windows above the doors at the front. It may have had a ridge roof rising from the top of the doors.

The windows appear on a flat frontage above the doors by 1928 and the roof was a single plane falling from front to back. Sometime in the 1940s or early 50s the building was extended to the north and over the railway siding entrance, which cut through the corner of the building. It was also extended at the front to join the next building forming a 'L' complex. The roof was changed to a serrated arrangement, which must have been more efficient in dispersing heavy rain and allow in more light. This later building still existed in the 1960s but did not last until the end, believed demolished in the 1980s..

Construction

For the period of our layout (1920s/30s).

Corrugated iron on three sides and roof with brick wall pierced by tall narrow windows at the rear. An artist illustration of the works shows skylights in the roof but from photographs it appears there were none. In fact the artist rendition of the building rear is quite different to the photographs. This may indicate an earlier arrangement.

Two rows of sliding garage doors ran the full length of the front with 6 large windows above. The doors have been estimated as 12 or 13 feet tall.

Architectural details of the north wall and boiler house are not clear from available photographs. We have assumed it is a boiler house due to a flue rising from a corner of it.


The Model

The next photo shows the model in situ on our full sized layout plan in a similar orientation to the real building shown above.


The design and general construction is the same as the Wood Store.

The rear row of sliding garage doors are fixed to give strength to the model but the front row are operational. They are 'L' shaped and are trapped within a sandwich of the front fascia. The windows above are opaque dummies. A textured 'concrete' floor is provided since it can be seen with the doors open.
We have modelled the north wall without windows and the boiler house with double doors. The flue is made from a cocktail stick with a track pin atop for a bird guard. Alongside the boiler house seems to have been a fenced area that is assumed to be a coal bunker or slag dump. All this may be inaccurate to prototype as no clear images have come to light of this side.
David

Friday, 20 December 2013

Thornycroft Building #3 - Island Building

Have you ever seen anything as weird as this?

Island Building

This building only appears as a distant view in photographs. It is difficult to see the details but upon scrutinising the roof it seemed to have a central chimney, until we saw a pole coming out of it! But, it was not until we zoomed into this photograph that we saw a swan neck on top of the pole with a blob on the end. Clearly a lamp post!

In the photo below the Island Building is on the left of the factory just below and to the right of the white ended building.

The Thornycroft Motor Works, Basingstoke, 1928 - Britain from Above

Function 

This was a building of two halves. The eastern half was the works fire station and contained fire appliances. The western half was a pump room. It contained 11 pumps and meters for the underground oil and petrol tanks alongside. A dispensing stand for filling vehicles existed outside the doors.

(Between 1928 and 1939 a paint mixing shop, built of corrugated iron, was positioned in line at the western end. Architectural details of this have not yet materialised for accurate modelling of it).

Time Line

The island building was a later addition to the factory, built sometime between 1914 and 1919. It did not last until the end, probably demolished shortly after manufacture ceased in 1969 when the site was taken over by a variety of small firms.

Construction

Difficult to determine from photographs but probably brick with slate roof. The roof had hips at both ends with vents at the apex. The long roof sides extended below the hip roof level. A lamp post with swan neck projected from the centre of the roof and rose above the height of surrounding buildings.

The Model

The next photo shows the model in situ on our full sized layout plan in a similar orientation to the real building shown above.

The building design and general construction is the same as the Wood Store.

Without a colour photograph the decor is guess work. Red doors are provided at the fire station end and blue for the pump room. A mistake was made in the roof design in that the long sides do not extend below the hip ends. One day we may remake the model to correct it.

We intend to provide working lights for some of the buildings on the layout and this one is the first to be fitted - not the inside (this model has opaque dummy windows) but the tall lamp post on the roof. The post is held in a cube of hardwood at its base, which is glued to the roof. Drain pipes on the real buildings were blue so it is assumed lamp posts were painted similarly.

The LED Lamp Post

This will be explained in full detail. Manufactured models can be bought quite cheaply from China on eBay but the swan neck models I saw are even more oversize than the scratch built model created.

The starting point was to find a small enough LED. 3mm (18 inches in N gauge) was the smallest found that was readily available.

The post was made from scraps of wire. At least one of the two power wires needed to be solid so that it holds the swan neck shape when curved. The gauge is not too critical as the circuit is low power. Had I thinner wire to hand I could have made the post more to scale but as it is the post is 12 inches diameter in N gauge.

The sheath from a thicker wire was stripped and slid over the solid insulated power feed wire and two very thin bare twisted wires for the return. The swan neck end was thinned down a little by scrapping the plastic sheath.

The wires were then soldered to the tails of the LED very close to its body and the excess tails cut off.


The lamp shade was made by sliding a metal washer over the LED and glue to its body. To this a thin strip of sticky paper was wrapped around the circumference to give more depth. A circle of paper was then cross cut and slid up the post and over the solder connections. Next, a piece of wire sheath from a thicker wire was slid up the post to the lamp assembly. Epoxy resin glue was dribbled into the assembly to form the convex lamp shade. The swan neck was quite easily bent to shape.


Below is the wiring diagram for one LED with parts identified.

And with that it is good night from me!


David

Friday, 13 December 2013

Thornycroft Building #2 Timber Drying Shed

Timber Drying Shed

In the photo below the Timber Drying Shed is the Dutch Barn like structure with the white end about midway up and far left of the works.


Function

The shed, and the adjacent canopied area, were used for natural seasoning of timber. Planks were laid out inside the shed on a raised floor and beams below.

There is a superb photo from 1902 of the interior here. At the end of the store are piles of ash felloes (outer circle of wheel that attaches to the spokes), along the sides are oak staves (vertical posts), and in the centre rough sawn oak planks.

Timeline

The shed was one of the original buildings from 1898, or thereabouts. It had an enclosed, narrow lean-to extension on stilts along the west side. By 1914 the extension had been replaced by the large open sided, canopied space. Between 1928 and 1939 part of this was enclosed and it is reported as being a 'washing space' At this time the ends of the shed were repainted a dark colour, most likely blue. It is believed from close scrutiny of photographs that a railway loading platform was not provided, or if it did then it was much lower than a normal platform. In the 1940's or possibly early 1950's the shed and the canopied area were demolished and replaced by a brick built warehouse together with a full size railway loading platform. It was known as 'The Wharf'. This later building lasted until the end.

Construction

Timber with corrugated iron roof. Timber pillars support the shed. Vertical wooden laths from ground to roof on the ends and east side. Louver panels on the west side. This construction gave a free flow of air through the building for timber seasoning. By 1914 the laths had been removed below floor level so that the lower part of the building was open between the pillars.

How entry was made into the shed is not known. From the 1902 interior photo there appears to be a door on the East side but this seems impractical as it opened onto a narrow alley way in our period of interest. We believe entry was not via the ends of the building. This leaves the sides (or the floor), which are mostly hidden within the surrounds so, how entry was made is less important from a modelling aspect.

In 1928 The canopied store had a corrugated iron roof with 11 skylights near to where it joined the shed. A 1939 photo shows only one clear skylight. Perhaps the others were blacked out with dirt or replaced with corrugated iron due to rot(?).

The Model

The next photo shows the model in situ on our full sized layout plan in a similar orientation to the real building shown above.

The design and general construction is the same as the Wood Store. The model is built onto a base of corrugated cardboard that raises the ground level to the top of the railway track. The base is painted with a mixture of grey emulsion paint and PVA glue and is then sprinkled with granite dust that is rolled into the mixture and the excess shaken off. The finish gives a fine texture and looks like concrete.

Pillars are cut from wooden barbecue skewers and chiseled square, as are the stacks of 'oak beams' positioned on the concrete floor. Each row of beams is spaced off from each other with 'planks'. What a mind numbing task that was and reminds us that a lot of materials were spread about the yard like barrels, oil drums, castings and debris. All this will need to be modelled to some degree.

Whilst gutters have been modelled (because we generally view models from above) I have not added drain pipes because they are a bit lost on buildings in this scale (N gauge). We can add them later if required. I made a mistake with the east side by giving it louver panels instead of the vertical laths of the prototype but, as it will be mostly hidden on the layout I'll leave as is. To correct it I can design a new decorative layer and stick it over the east side.

The skylights are transparent but do not show up well in the photo on the right. When light is shone from above it beams into the interior, much like a 1919 picture of the shed we found in an archived 'The Commercial Motor' magazine.

David

Friday, 6 December 2013

Thornycroft Building #1 Wood Store

The imposing feature of Thornycroft Sidings model railway is the industrial buildings. These are constructed before the baseboard and trackwork, (whereas for Cliddesden the baseboard and track was laid first because the rural landscape there is more dominant than the buildings). Most of these early  Thornycroft Sidings postings will be about the industrial buildings. This being 1 of about 15.

Most of the written material publicly available that we have found focuses on the history and development of Thornycroft vehicles. There is some commentary and images of the factory departments and processes involved in manufacture but nothing written about the changes to the factory site over time, unless you know otherwise.This Blog maybe the first attempt at investigating that history.

Wood Store

In the photo below of the real factory the Wood Store is the building top left.


Function 


The Wood Store held timber and other natural material in a dry, airy environment. Wood, particularly oak and deal (Scots pine), featured strongly in early vehicle bodywork construction.

Timeline


The six bay Wood Store was built well after the inaugral buildings of 1898. It is recorded as being in use by 1917, which suggests it was needed in line with the massive expansion of production for military orders during the first world war. An extension, added before 1928, increased the length to 10 bays. The building survived to the end but fell out of use in latter years.

Construction


Concrete floor and 'I' girder frame infilled on three sides with a warm, orange/brown old English brick bond. The extension used a lighter coloured brick. The goods loading side comprised full height louver wooden panels for free air flow. Doors were of the roller type. An 'I' girder gantry ran the whole length of the building except the extension gantry was made of wood. A hoist was fitted to the gantry to assist loading and unloading of railway wagons to/from a wooden floor positioned at mid height.

This wonderful picture from the late 1920's/early 1930's of an A3 six wheeled lorry unloading straw (probably used for vehicle seat padding) provided much close up architectural detail of the building to aid design of the model.

Sometime between 1939 and the 1950s the loading side was remodelled in corrugated iron with sliding doors and the long gantry taken down.

In the original building the interior was open plan with metal trusses to support the roof. Wooden trusses were used in the extension and two rows of concrete pillars with floor beam brackets moulded in. No pillars evident in the original building. From the roof trusses two rows of industrial pendant lamps ran the length of the building about a quarter in from front and back.

The east facing roof was covered with diamond shaped shingles throughout its life. A 1960 photo shows the west facing roof to be corrugated iron! The model assumes it was shingles in our period of interest. Five louver venting structures sat atop each side.

On the south end was an entrance door and a sign above declared it as 'Stores Office'.

The North end wall was painted white and the company slogan painted on. From a distant 1939 aerial photograph only the Thornycroft word is legible. There has been debate on what the other words were. After much scrutiny of the photo the first word seemed to have a U and T bearing some resemblance to Trust and the last word looks like Transport. A search in Google for 'trust thornycroft transport' gave the Hantsweb web site, which stated the company slogan as being 'Trust A Thornycroft With Your Transport' - a perfect match!

The Model


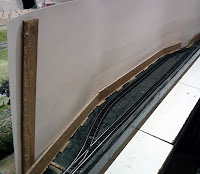
An overview of model construction is presented here with key points elaborated. The next photo shows the model in situ on our full sized layout plan in a similar orientation to the real building shown above.


The decor is created in a graphic editing program and printed on an Epson inkjet printer with Durabrite Ultra ink. The ink has good colour retention properties and is waterproof. Some parts are printed directly on 0.35mm card and cut out. Others are printed on A4 sticky label sheets, which is then stuck to the card. Gutters are formed from 80gms printing paper using the card as a former to make the channel.The construction is modular with 10 stacked together. This gives rigidity and strength to a model that is 445mm long! (massive for N gauge). A plinth is built in that will disappear into the groundwork.

I have an idea to use corrugated cardboard to raise the ground to the level of the railway track surface and around the building. The next photo shows how this might be achieved by cutting back part of the cardboard so it sits on the sleepers butting to the rail. The inset is an upside down view showing the cut back. Another idea being considered is to flood the ground with plaster or clay, a more messy and permanent solution.


The 10 roller doors are all operational. Each is scored horizontally 0.5mm apart and the door bent around a rod to encourage curvature. They are held in guides either side of the opening. Handles are formed from wire. Armed with a scalpel point on a door handle it can be raised and lowered. When the door is raised it bends to run along the inside face of the roof.


The hoist gantry is Plastruct 1.6mm 'I' beam. The assembly is delicate and will break with rough handling. The hoist itself is a naive construction of washers, wire and thread but it can be pushed along the gantry with care.

The only internal decor is the concrete and elevated floors since they are visible when doors are open.

David

Sunday, 1 December 2013

Cliddesden In Print

Subscribers to 'Your Model Railway Village' part work should find that in issue number 8 our Cliddesden model railway is featured across four pages.

magazine snapshot
(content displayed with permission).

David

Saturday, 23 November 2013

Rebuilding Basingstoke Thornycroft Factory

Thornycroft Sidings - Initial Research

There are three things we need to know in order to make representative model buildings for our model railway layout; the size of them, architectural details and their function.

What made our project viable was the recent publication of aerial photos of the Thornycroft factory at Britain From Above. Together they give a good 360 degree view of the factory as it was in 1928 and 1939. From these we can see positioning of buildings, some architectural details and all manner of manufacturing materials and vehicles spread about the site.

The footprint area of each building was calculated from old scale maps of the location but calculating building height is another matter and without architectural plans we must scale from suitable photographs. Our Basingstoke and Alton Light Railway reference book has a few photos. Scouring the web revealed more and in particular those at Commercial Motor Archive, Grace's GuideHantsweb and the Thornycroft Register, which has many photos of vehicles staged in front of the factory buildings.

We discovered on Hantsweb that Hampshire County Council Arts & Museum Service has an archive of Thornycroft photographs that are viewable in Winchester by appointment. We arranged a visit and were given hospitality and sight to hundreds of rare images, many of which were commissioned by the museum at the time of the factory demolition in the 1990s. I was surprised to learn that the factory buildings existed at all in the 1990s because we have lived in the borough since the 1980s and have no recollection of every seeing them! The photos gave many building details, in particular intricate interior architectural details were revealed. Whilst we are not modelling interiors to any large extent the interior shots do help our understanding of  building construction.

The bigger challenge is identifying the function of every building from the smallest office to the largest warehouse or factory. Hantsweb gives an overview of what functions were provided but does not relate them to identifiable buildings. Commercial Motor Archive gives much detail about the Timber Shed but it seems for the rest the question may only be answered by speaking to those who worked there.

David
Wednesday, 20 November 2013

Happy 2nd Birthday

Happy Birthday to us (well it was in October - sorry for the delay).

Another year, has gone, which has seen us exhibit Cliddesden station to the public, which was well received. Stay tuned for announcements of other venues we will be visiting over the coming year(s).

For this year, the start of our next layout from the Basingstoke and Alton Line - Thornycroft Motor Works sidings, read the overview here. Follow us, to receive updates as we start researching and constructing it.

I would just like to thank you for reading and following us.

Thanks for your support,

Ed & David

Wednesday, 30 October 2013

Storm Damage

Severe gales with wind speeds of around 80 mph sliced off the tops of three trees in the Cliddesden hedgerow. Thankfully new growth will restore the majesty of the trees.


What you have just read is fact and fiction and shows how a bit of imagination gives life to a model railway.

The truth is that we have experienced a severe storm, not August 1916 (the period of the model) but October 2013. The worst storm since 1987. It is also true that the model trees did suffer damage, not from a storm but from a corrugated cardboard cover placed over the layout to protect it during transport. Unfortunately it had collapsed flattening the trees somewhat.

 The tree above may not look to bad to you but it should have more of a dome shape.

Here are the replacement trees, a work in progress. They are made from sprigs of dead Sedum flowers glued together. To finish they need to be painted green and scatter material applied to represent the leaves.

David


Tuesday, 22 October 2013

More LSWR Cattle Vans

Another auction, another win. Two more Graham Farish SR cattle vans re-badged LSWR and weathered completes our rake of three cattle vans for the Wednesday cattle train that served the three stations on the line. Details on the conversion can be found here.


David

Sunday, 13 October 2013

Show Time - Thank You

Cliddesden made its public debut on 12th October 13 at the Farnham MRC expo. in Aldershot. This was not only Cliddesden's first outing but was also the first time the operators had exhibited.

Having unloaded the kit some electrical connectivity issues on the layout were manifest due to damage in transit but, like good boy scouts we were prepared with an array of tools and it was quickly corrected. Thereafter everything went smoothly and the 'hand of God' was not evident as much as we feared, except for uncoupling wagons on the layout - how do you elegantly separate Rapido couplers?

Farnham MRC gave us a great pitch and were well organised in providing services and hospitality. We would like to especially thank Noel and Kevin of Farnham MRC for their welcome and others who's names escape us.

The layout was well received by the public who seemed drawn to it by the fine details and/or overall ambiance of the scene, which is actually quite easy to create when a layout is of a real place. Cliddesden did not make it into the top four layouts voted by the public, but it was 'mentioned in dispatches' at the after show party.

To everyone who voted for us - thank you.
To those who enjoyed our little layout and voiced praise - thank you.
To those who attended because they read about it on this blog - thank you.
To those who saw Cliddesden and are now following this blog - welcome.
To the children who were enchanted by it and dragged their parents back for another look - thank you.
To the adults who spent an inordinate amount of time transfixed by the layout - is that healthy?
To those who recognised Clidddesden from their own connections with the real place - we hope it rekindled fond memories.
To those who cited Buggleskelly, Oh Mr. Porter or The Wrecker - you know too much.
To Trevor (brother & uncle) who gave us a break towards the end of the last day by operating the trains - Thank you.
To those who were inspired to start or finish their own layout - that's why we exhibited.


How the layout was received by the public was a test as to whether or not we would exhibit again and start our long talked about Thornycroft project (the factory being a few miles up the line). We received two invitations to exhibit at other shows and are pleased to say we would be interested in attending shows within our local area. With regards to Thornycroft - watch this space.

Finally, one visitor who viewed all the layouts voiced his praise of Cliddesden with one word - "unique".

Ed & David

Spectators
Guest operator

Saturday, 5 October 2013

1 week till show time

The public début of our Cliddesden N gauge model railway. Is scheduled to appear at The Farnham MRC annual exhibition, Connaught Leisure Centre, Tongham Road, Aldershot, GU12 4AS Saturday 12th October 2013, 10-5 and Sunday 13th October, 10-4.30.


We have done a trial dismantle and set-up, so we know that it all fits in my standard 5 door car, and we worked out we can have it all set-up in under 1.5 hours.

In order for you to find us, I have designed a Banner for our stand, it represents the station sign as it would have been, with some simple pictures showing the actual station as it was during it's early life. We have also included a QR code, so people at the show can find out more by reading this blog. A QR code is a simple bar-code which smart phones can read (provided you have the right app), which will open the URL to this blog.

Here is a sneaky peak of our Banner so you know what to look out for at the show:

It's full colour, and printed by our local printer directly on 5mm Foamex (30cm x 184cm). We simply hold it in place with a few clamps to our frame.

We hope to see you there...

Ed

Tuesday, 24 September 2013

John Wallis Titt Wind Turbine

Over a year ago we modelled the Wind Turbine that pumped the water at Cliddesden http://ngaugelightrailway.blogspot.co.uk/2012/03/wind-powered-water-pump.html, and mentioned that it would be good to take a visit to the only existing example of the wind turbine today. Luckily it's only 15 miles away from where we live.

Over a year later I finally managed to make the trip over the Hampshire downs to visit the John Wallis Titt Wind Turbine at Crux Easton.

The trip was a planned mountain bike trip following Wayfarers Walk, a trial that extends over 70 miles from Emsworth to Inkpen Hill. Our journey was only part of this, Oakley to Crux Easton, taking in views over White Hill, Watership Down, Sydmonton Estate, Beacon Hill and the Highclere Estate. It was a very enjoyable mountain bike ride, and well worth having the Crux Easton wind turbine as the focus point.


Maybe in the future we'll make our little model a little bit more accurate, now that I have some detailed pictures, but to be fair when modelling in 'n' scale most of the detail is lost, and our model is a good representation as it is.

It's not something you see everyday, so if you are around the area, I would recommend a little visit. However if you wish to get any closer than the fence, be warned it is only open on the second weekend of each month between April and August. Find out more here: http://www.freewebs.com/windengine/corepage.htm
Ed

Saturday, 7 September 2013

Southern Railway Era

Mixed train of 1925 leaves Cliddesden station for Alton. 

Head code disks on the front of the engine are metal washers just over 2mm diameter with the holes filled in. Prototype disks were 15 inches in diameter (2.5mm for N scale).

Behind the engine is a SR tarpaulin covered wagon, GW box van and 48' tri-composite lav. passenger coach.

The station building is in Southern livery with SR noticeboard promoting south coast holiday destinations.

David

Friday, 6 September 2013

Southern Footplate Crew

Loco crew from the Fleetline range painted and ready for mounting on the footplate. The crew are glued to a strip of brass that slides in between the handrails. I'll use double sided tape to hold it in place.

Looking at the loco we can just make out that the far handrail has the top half missing. I'll try and make a piece from fine wire and glue it to the remnant. The loco will also need two head code disks but at only just over 2mm diameter I'm not sure yet how to make perfectly round disks.

David


Tuesday, 3 September 2013

Back Scene


From the front
From the start our plans never had a back scene, and in some respects this was absolutely fine for our little layout which was only going to be used at home, where the audience was just family and friends. 

All the back scenes so far in our blog have been superimposed via photo editing software. The advantage to this was that we could create different back scenes for different views of the layout, without spening extra money on printing costs etc.

However now that the public will be seeing the layout we thought it would be a good idea to put a back scene onto the layout, so that people with cameras, can take a picture without other objects and people in the background, namely me and my dad eating cake.

So, we made a trip to Cliddesden as it is today, and took a panoramic photo of the fields and tree line behind Cliddesden station. The photo's were then processed in a photo editing program and then printed at a local printing shop on photo paper, to the dimensions we required in this case 120cm x 21cm. 

The back scene follows the back of the layout, following the curve in the back where the siding is. It slots in-between the back and a wall of 1 inch high hardboard, it is then supported by extra card to stop it flapping about. The good thing with this is that we can change the back scene without causing damage to the layout.
From the back

Ed


Wednesday, 21 August 2013

LSWR Cattle Wagon

I won an auction for 3 different wagons in disrepair including a Graham Farish SR cattle wagon, which is the item I was really after as I wanted to convert it to LSWR. I feel happier converting a wagon that has a little bit of damage than bodging up a brand new one. The only fault with the cattle truck was the roof, which had been badly painted and had an unsightly locating plinth that was visible through the railings.

The other two wagons had more damage. Parts from both had to be used to make a good wagon that I can sell at auction. Hopefully, this tactic will result in a return on my expenditure that means the cattle wagon cost nothing!

The changes needed for the cattle wagon were to put the roof right, change the SR legend to LSWR and apply some lime wash. Lime wash was a disinfectant used until about 1924 when it was made illegal as it caused health problems for the animals - I read that it rotted hooves.

The Graham Farish cattle wagon is based on a GWR diagram, I believe, but it looks close enough to pictures of LSWR types.

First job was the roof. The offending plinth was cut away and the black paint finish removed with emery paper. Unfortunately it cut right through the original white finish to the grey plastic. Not too troublesome as I intended to 'dirty' the white anyway.

The SR lettering was scratched away and LSWR letters applied taken from BR words on a 'pressfix' sheet, except no 'w's left so that was applied with paint and an ink mapping pen.

Weathering of the roof and application of lime wash was the last job. I have been impressed with weathering techniques used by other modellers, especially the use of powders, and wanted to have a go. I could spray paint instead but I felt the powder would be more controllable on such a small model.

I found a good review of MIG Productions powders as being well suited to 'n' gauge because they are very fine. However, I did not need a large quantity and they are relatively expensive. Then I found a video at YouTube that demonstrated the same effect could be obtained using cheap pastel crayons scraped with a knife to make the powder that is then dry brushed onto the model and guess what - we already had a white pastel crayon in the house from previous art interests.

Powders need a base to adhere to so I sprayed the roof with artist fixer spray (matt varnish will also do) and brushed on some white pastel scrapings. This was then sprayed again to fix the powder and all repeated again to whiten the grey roof further. It is in fact much more grey than shows in the photo below, giving the impression of a very dirty white roof.     

I then proceeded to apply the powder to the inside of the body, outside of the top railings and along the bottom of the sides and chassis. The end result is quite pleasing albeit not as white as shown in prototype photos but I expect the whitening effect varied and I did not want the finish to be too glaring.

David

Monday, 12 August 2013

Back To Reality

In preparation for making a photographic back scene we went out to the actual site to take photos of the distant landscape. Cliddesden station, or rather the flora that it has returned to, is behind the photographer, who is standing at the field entrance on Station Road - both of which appear on our model layout.

If the back scene works then the tree line with sky above will be a good scenic break for the model.

I joked before we went that being August the field is probably wheat with a 21st century combine working there. Sure enough the field was wheat, albeit much shorter than the variety grown in 1916. Fortunately, no combine there to spoil the view.

We also had to check there were no jet vapour trails across the sky.

David

Saturday, 27 July 2013

Spot The Difference

Basing a layout on an actual place and time is fraught with danger in terms of colour matching where only black and white photographs prevail. It has been bugging me since 'familydesmond' commented that our 1925 station building colour scheme seems too dark. Going back over the source data again lead me to agree.

If the station building was clad in weather boarding then the Southern Railway colour would have been Stone 1A. Our building is corrugated iron. It appears a lighter colour in photographs than its wooden window frames so it too was probably the stone colour. I have therefore, remade the building appropriately.

1925

1916

The 1916 version is probably LSWR cream iron and brown woodwork when looking at period photographs of Herriard and Bentworth & Lasham but at Cliddesden the iron colour appears much darker in early photographs, perhaps it was LSWR brown iron with cream window frames, except a photo exists taken after the closure of 1917 and before tracks were relaid that shows the corrugated iron to be a lighter colour than the woodwork. So, hopefully our 1916 version is about right.

David

Saturday, 13 July 2013

Webbed Belt to Hurdle Fence

On a quest to make wagon loads typical of the freight carried on the line our reference book states that manufactured wooden products were dispatched from Cliddesden. What might that be exactly? We are two years into the first world war so it is hardly going to be fancy furniture. The answer could be a little more basic and rustic. There is a photo in the book showing a hurdle maker at his craft with stacks of  fence panels all around.

It was around this time (1916) that food was getting scarce and the populace were being encouraged to grow their own, keep chickens and fatten a pig. So, our wagon load could be hurdles being dispatched to a customer who is going to build a pig pen. Using the same raw materials (beech coppice) our crafty worker could also have been making bean poles for lawned gardens that were being turned over to vegetable growing.

What can be used to represent a hurdle in 'n' gauge? Initially, no idea. It is in this situation I find a steady stroll around the supermarket can reveal products suitable for adaptation. The first product found was a kitchen sieve with plastic mesh. Perhaps the interwoven weave could be created with a wool stitch? A little further on and a webbed luggage strap was found and on close examination I could not believe what I saw. It had the vertical stakes and interwoven weave of a 2mm scale hurdle! To avoid the expense I wondered if we had something similar at home.

Scouting around the garage, loft and cupboards some webbed belts were found with the same weave. Unfortunately, the belts were too thick. But then my wife said she had one and on inspection I found the thickness was acceptable.  She kindly exchanged the belt for a length of string and I went away happy.

I only needed about half an inch off the end for a stack of hurdles so it was a shame to destroy the belt. But I was careful and it is possible to repair it, although wifey may need to loose some weight around the waist to wear it again.

Once the hurdles are cut off  (to dimensions deduced from the photograph of the hurdle maker) the cut ends need to be sealed with PVA glue to stop the weave fraying. I guess for some people that would be job done, after a lick of brown paint. Not for me. Hurdles are made with extended poles for insertion into the ground. The extensions were represented by pushing and gluing very thin wire into the weave, difficult and frustrating task but worth it for the effect. The stack was made solid by gluing the individual hurdles together. Finally painted brown with a dry brush of white.


I think you'll agree the hurdles look right.

The bean poles are very small twigs tied into bundles with wire and soaked in diluted PVA glue with a spot of washing liquid to reduce surface tension..

I suppose I could make more hurdles from the belt and sell them on the web at £5 a stack. (Does anyone buy this stuff?). Trouble is, to do it properly with the pole extensions is time consuming. I'd be working for a lot less than the minimum wage!

If you have been following this mini series on wagon loads then this is the end.

David


Thursday, 4 July 2013

Crated Vegetables

These were fiddly to make. A printed graphic artwork was made up as one large block of multiple crates, wrapped around a block of card layers with a matrix of inner side walls added to the top layer of crates.

The outsides were given relief by pressing and running the blade of a small screwdriver between the slats.

The vegetable representations may be of more interest. On the left are crates of potatoes made from very small cork granules. The centre boxes are carrots made from very small dead petals of the yarrow flower painted orange. On the right are cabbages, which are scraps of Woodlands Scenics foam.

These crates will reside on the platform when scheduled for transport by a covered van. We will not load the van in practice as the large single block will not fit through the van door! It can be placed in an open wagon but I don't think that would be used in reality for perishables.

David

Tuesday, 2 July 2013

And then there was light...

I wanted to be a bit fancy with lighting... Ideas of potentially adding cloud movement, and simulate sunset and sunrise would have added additional interest to the layout, and I had a few ideas on how I might have produced such effects. Using DMX controlled DJ lights was the avenue I was going to go down. I found a few suitable lights but unfortunately they never gave the correct effect and were expensive. The "white" light produced from RGB LEDs is simply not white enough, producing an unnatural blue tinge, but on the other hand it had the advantage of creating an orange light for sunset and sunrise. However I could not control each LED so, producing moving clouds was out the question. The second DMX light I tried was a light bar with 10 individual warm white LEDs, now I could produce the cloud effect, but the down side was each LED produced a spot effect on the layout, not ideal. So to the compromise...


LEDs were the way to go forward, no heat, low power, and long life, but now I had to put aside my dreams of lighting effects and make do with a static light. After a quick search on ebay, I came across some LED rigid light bars (used for under cabinet lighting) - when buying on ebay be warned they may not always be what you expected. They come in various sizes and colours (RGB, warm white, cool white etc), we went for a 1 meter long warm white LED rigid bar, however testing the light out on the layout, we soon realised we needed another one as it was not bright enough at the distance we are hanging them, and it did not cover all of the layout.
The lights are screwed to 6ft wooden battens (painted black), with hand made aluminium ends to stop the bars slipping off  the overhead rigging. This means they can be placed at different distances to produce an even light over the layout. Both lights are powered from a 12v power adapter.

Overall It produces a convincing warm summers day light, over Cliddesden.

Ed


Monday, 1 July 2013

Bricks and Mortar

Founded in 1900 the Associated Portland Cement Manufacturers Ltd was an amalgamation of 24 cement companies. In 1978 it became Blue Circle Industries PLC. In this wagon is a stack of Portland cement bags bearing the circular APCM logo.

Each bag was individually made with FIMO clay by pushing a lump through a rectangular hole in a piece of rigid plastic. As the clay protrudes it takes on the bulbous shape of a filled bag. Each bag is 'stuck' to each other (being clay they naturally stick to each other) to form the stack and then heated to harden. The blue circle logo is enamel paint picked up on the end of a very small metal tube and dabbed carefully onto each bag of the top layer.

The bricks are an artwork created in graphic editing software, printed and stuck to card to form a large block. Each brick has the 'frog' formed by pressing the end of a small flat blade screwdriver to create the indentation - a surprisingly effective finish to the model.

David

Sunday, 30 June 2013

Timber

Freight marshaling is a fascinating operation because it demands planning for the efficient movement and placement of wagons in the Goods Yard. On a small layout it is an essential activity in order to increase operational interest.

Typical freight handled at Cliddesden are timber, wooden manufactured products and agricultural produce moved out; building materials and coal moved in.

The simplest product to model is timber but when you consider a 6 inch plank is only 1 mm wide then the practicality of modelling individual planks could be troublesome. My solution is a large block of balsa wood scribed to represent planks, although the scribing is barely noticeable until a sharpened lead pencil is run along the cuts. The planks are 'tied' in bundles using thin wire that is poked into pre-drilled holes.

The ends are 'painted' red using a felt tip pen lightly rubbed over.

All sides of the loads are modelled so that the same load can be used in a wagon or placed on the loading platform.

David

Sunday, 23 June 2013

Show Time - Part 3

The stand skirt is one length of 1.4m wide, 100% black polyester cloth labelled as 'banqueting cloth' in the shop so, I guess it is meant for covering table tops. It was inexpensive compared to other grades of black cloth at only £2/m and is quite opaque. The ends were folded and stitched for the required length and height and then fixed to the frame with hook and loop sticky pads.

Black is the traditional colour for framing exhibition model railways as it highlights and focuses attention on the model but, I have subsequently read suggestions that a brown material is just as effective to focus attention but gives a lighter mood and blends with the model, suggesting the underlying earth of the landscape.

Beneath the table top two miniature speakers have been positioned at each end of the main railway track, fixed with hook and loop sticky pads. We plan to play sounds of the landscape and the trains as they pass through.

The LCD monitor is fixed to a pole which clamps to the frame. A presentation introducing the historical basis for the model  and explanation of cameo scenes built into it is shown and from time to time the train roster to support the arrival and departure of trains can be shown.

David

To Part 1

Sunday, 2 June 2013

Show Time - Part 2

Continuing with our list of stand preparation work this photo shows the added bracing to stop wobble.  Wanted to keep the assembly as minimal as possible so one brace added to each end and two to the front held with M6 bolts screwed to the frame. For transportation we remove the top bolt and swivel the brace parallel to the uprights.

The table top is also shown, made from 6 off 3' x 1' melamine shelves that we had stored for the past 20 years or so! One of these has a hole cutout for the railway umbilical power/control cable. The railway layout is simply placed on top of the table top.

The kitchen cabinet underneath is not part of the kit. The odd shaped mdf panel up against the wall is the cut-off from the model railway landscape base.

To Part 3

To Part 1

David

Tuesday, 21 May 2013

Cliddesden 1925 - Staton Building

Stationcolours.info is a great resource for finding out about colour schemes of the British railway companies. I learned there that the early Southern Railway building colour was Middle Chrome Green BS381C shade 226. A colour swatch was found elsewhere on the web and our existing design file for the LSWR station building was modified from LSWR cream and brown to SR green.
The website suggested that the building colours did not change from the pre-grouping schemes until 1926. I have no evidence as to what/when Cliddesden was painted but at the re-opening ceremony in 1924 the new Southern Railway poster boards were present on the building and it is reasonable to assume these and the building were green.

These poster boards were not present on the earlier LSWR building so it has been interesting to do the research into poster styles of the 1920s. From left to right we have Brighton then Hayling Island, the B&ALR 1925 timetable and finally Isle of Wight.


David